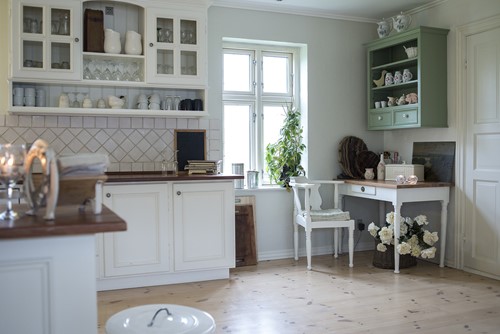
Paint is the magic elixir when it comes to inexpensive home makeovers. It rejuvenates space in a way few other things can do. Yet many homeowners have blinders on when it comes to the places they can paint. Namely, they only see the walls as a palette. Let's challenge that notion and remind you of a new way to use paint -- on cabinets.
Whatever you do, don't skip step one — prepping. Though tempting to overlook, the risks of ruining your cabinetry if you do are simply too high.
To prep your cabinets, begin by labeling each cabinet opening and door front with corresponding numbers marked on painter's tape. This will save you countless headaches when it comes time to reinstall. You'll remove the labels before spraying with primer and paint, and then replace the tape when you're ready for reinstallation. You can place the labels just above wherever you've set the pieces to dry so you don't lose track.
Remove all hardware, including hinges and screws. If you're getting new hardware, it likely won't align properly, so be prepared to redo these holes later.
Wipe each cabinet front with a bonding solvent. Allow 1 1/2 hours of drying time before troweling a thin layer of spackling compound over the entire surface to fill holes, blemishes and wood grain pores. Use a second coat if deep holes are evident.
Next, it's time to sand. Doing so eliminates any existing sheen or protective sealant from your cabinets, thereby allowing primer and paint to bond appropriately to the surface. Fine-grit sanding blocks or pads work best for most cabinet and drawer fronts; however, rough-grit sandpaper is acceptable for cabinets with a lot of lacquer or shellac.
After vacuuming or wiping down the cabinets, add primer using pigmented shellac sealer and a 2-inch brush. Pour about 1 1/2- inches of your primer into a small can and dip the brush about 1-inch. Press the brush against the side of the can to remove excess primer. Don’t wipe it across the rim, as this removes too much primer. Shellac dries quickly, so move fast and avoid going back over areas that have started to dry. Try to avoid heavy buildup and runs, but don't be overly concerned with uneven patches.
Brush on the first coat of paint, then smooth it out with just the tip of the brush. Follow each layer by sanding lightly using a fine-grit sanding sponge.Allow at least 8 hours for each layer to dry before going over it again. Work from top to bottom to avoid dripping on finished areas. Likewise, paint the insides of the cabinets before moving to the outside. If any paint spills onto a finished area, simply dab it with a cloth dampened with mineral spirits.
Finally, it's time to reinstall door hinges, handles, pulls, mounting plates, and other hardware removed for the project. Once this is complete, attach the door fronts and reset the cabinets in place.
Getting ready for a move or remodel can be stressful. Call, email or use the contact form on the site to schedule a consultation today.

David has been helping clients with their real estate needs since 2006. On Hilton Head Island he has experienced and lived in the villa, gated, and non-gated communities. His love of this unique area and care of his client's individual needs are of utmost importance. Whether you seek a dream home or investment real estate he can help you achieve that goal.
He is the current President of the Property Owners Association of Burkes Beach, an upscale beachfront community located mid-island. He is an avid college football fan and University of Tennessee graduate in Business Management. He is the proud Father of five island children, Palmer, Baylor, Banks, Beres, and Jewels.